With the exception of the lucky few, most all of you reading this do not reside in an alpine environment. Yours truly, along with everyone
else in the Great Lakes Chapter of NARGS, is not counted among those lucky few. In fact I ask you to imagine a flat, packed, clay path, wandering back for almost five unbroken decades. That would be an apt analogy of my gardening life here in southeastern Michigan. So of course, I have taken up rock-gardening, here in the Midwest, the very epicenter of the alpine gardening world! It is after all, merely the naturally rational destination (horticulturally speaking) in a landscape dominated by such soaring peaks as are found on a billiard table, combined with gritty, open, free- draining soil that grows tile-works and endless subdivisions.
You see, the ravages of time, as well as the stellar rise of my career-path, have failed to provide me with sufficient disappointment. Nay,
I want to grow Androsace and Eritrichium, in the rarified air that wafts between Chicago and Detroit! In pursuit of this fool’s errand, I have stumbled my way over every conceivable mistake one could make. I have even created new categories of original blunders. Oh, and the unspeakable dollars traded for uncountable, orphaned plant labels. Well there will be no more about that. Yet with the passing years, small victories build up one upon another, and hard-won gains have been made in the garden. I am currently working my way thru my second pick-up truck: the crushed-down bed can now hold about as much rainwater as our dogs’ wading pool.
You might well surmise that after all this time I should have amassed a treasury of sage gardening wisdom to share. Alas, I am for the most part a life-long amateur who was lucky enough to have settled right smack-dab in the middle of real rock gardening giants. What’s more, it was at a time when alpine nurseries, as well as seed purveyors were plentiful. All of those plantsmen and plantswomen have shown me nothing but generosity and patience, their words and written notes always encouraging and helpful. That I have arrived where I am today with the garden we have, must be credited to all of those wonderfully generous people that Andrea and I have come to know from our association with the Great Lakes Chapter locally, in addition to the many more kindred souls we’ve met via the broader scope of NARGS, be they visiting speakers we have hosted, friendships formed at National meetings and those we’ve met right here in the pages of the Quarterly, and Bulletins of the past. All of the ideas, the tips as well as the tribulations, the decades of amassed gardening knowledge that has been poured at my thick skull. This fellowship of passionate gardeners, that’s the real source of any success I have had as a rock gardener.
I hope I have established that I am no rock gardening- wiz, in fact I am known to have the “Brown Thumb” among my closest cohorts of stone. So, what I would ask you to consider is that a bungler like myself, from as unlikely a rock-gardening state as Michigan might seem to be (with a soil and climate that is far from the “Alpine Ideal” - and let’s face the facts, people, less than the “Alpine Ideal” is where most of us are gardening), can succeed with alpines. Whether you are truly a “Master of Gardening” or merely a muddler like me, I believe that one of the greatest equalizers in successfully growing the classic alpines in a non-alpine environment is to grow alpines on tufa.
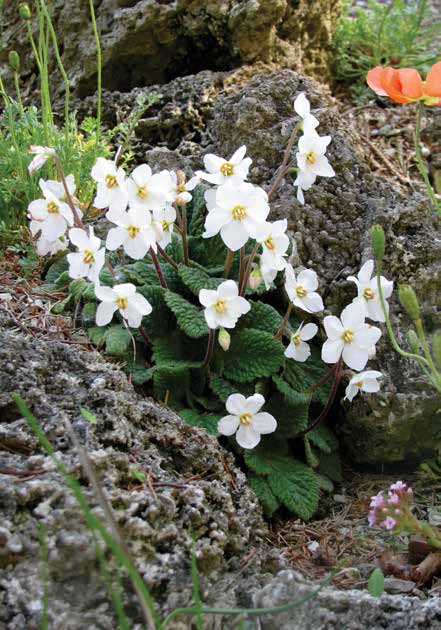
O.K. O.K. I can hear the collective groans, “Oh sure any yum-yum can grow alpines on tufa.” And that is the point I am going to try and make. Just about anyone can grow alpines on tufa as long as those alpines have any chance at growing where you garden. Tufa or no tufa, no one I know is growing cremanthodiums or Himalayan meconopsis in southeastern Michigan; it’s just too hot here. There are countless genera I have as yet to try, or have tried and not yet found the proper siting for them to succeed. However there are many challenging alpines which have performed very well for us here in “Fly-Over-Land:” Eritrichium, Porophyllum saxifrages, Phyteuma comosum, and Jankaea, to cite but a few.
Tufa is a soft, porous, water deposited mineral. As Tony Reznicek dicsusses in his article on tufa, when mineral-rich water exits from
the side of a hill, as in a seep, or wells up from below ground as a spring, the calcium-carbonate precipitate adheres to anything it comes into contact with: mosses, grasses, equisetum, even soil. This process continues and the above items become encrusted with minerals to the point where they become entombed within the ever-growing mineral deposit. Additional plants grow, more detritus falls, the mineral plating tufa deposits grow larger and larger, forming mounds and ridges, covering hillsides, or rimming springs and stream banks. There is a small tufa spring that drains into a secluded segment of the Huron River not far from our home. Tufa has been deposited over the bank and along the riverbed, even coating discarded junk sitting on the riverbed. I have found tufa-coated items such as an old serving fork and a four- inch diameter iron collar nut.
It’s when you get tufa into your garden that the magic begins. The relative softness of tufa enables it to be shaped easily, whenever a “just- so” fit is required. My tools of choice when performing tufa alterations include an old claw hammer, brick chisel, and hacksaw. When setting tufa, I bed the chunks of stone directly on top of, or partially nested down into my heavy clay soil. By doing so, the tufa can wick moisture right from the damp clay below, in addition to any moisture that percolates down from above as rain. The gaps between neighboring chunks of tufa are backfilled with a mixture of sand, loam, sharp gravel, and any tufa fines. I have covered a sizeable portion of a hillside in this manner, with very good results.
Having seen pictures of Harry Jans’ tufa wall I knew I had to try and incorporate one into the garden. When stacking tufa vertically (in my case against a supporting bank), I paid extra attention to ramming the clay-loam soil into the bank-side of the tufa, filling any voids in
and between the stacked pieces. This was done to promote moisture transfer from the bank to the tufa wall covering it. This soil ramming
is done with each course laid. I also lay down a thin layer of clay-loam mix before I set the next course, just enough of the mix, so that when I press down the next chunk of tufa that I am setting, the mix is squished into any pockets and voids until each chunk of tufa is resting on the one below it. As with laying a dry-stacked wall, one must pay attention that previously set stones completely support their neighbors without any wiggling of a loose stone. But I am no mason and I do a bit of cheating by mixing up batches of a hypertufa-like mixture; however, I substitute sand in place of perlite, and double or even triple the amount of peat moss, to get the consistency I want. Concrete pigment is added so that my mixture matches the tufa’s hue. With judicious placement, I utilize the mixture to blend disjointed chunks of tufa together, and cement in place small, wedging pieces of tufa. I think the results are a realistic- enough-looking tufa bank.
It is tufa’s porosity that makes it such an ideal medium for growing alpines. This porosity is due to the myriad spaces within the tufa’s make-up. All of those tiny to not-so-tiny spaces were created by the spaces vacated by decomposed, organic material that became entrapped within the tufa as it was formed. This mineral, sponge-like matrix allows plant roots to penetrate into the tufa interior, seeking out the moisture and minerals the plant requires. The rest of the plant, sitting out on the bare rockface, reaps the benefits of the water-shedding surface in addition to the added air exposure, especially important in our often-stagnant airflow conditions.
Once in the garden, any new tufa addition is quickly colonized by nearby alpines seeding themselves. Aquilegias, drabas, small poppies, Sedum pilosum, as well as many of the penstemons, readily sow themselves onto tufa. Sadly many weeds will also take advantage of tufa’s attributes so you need to be vigilant. If dandelions are allowed to become established they are nearly impossible to extricate from tufa without actually gouging them out!
I have found Eritrichium howardii to be quite amenable to sowing directly onto tufa. I empty a packet of seed into the palm of one hand, pick up a dead spruce needle (they are the handiest) touch one end of the needle to my tongue, then grab a seed with the wet end of
the needle, and tuck the seed into a tiny pore hole in the tufa. I have followed this technique with many seeds that are too dear to simply sprinkle around. For some reason Eritrichium survive the best, though that is probably due to predation by roving herds of pill bugs with no taste for Eritrichium. I have had flowering mats of Eritrichium howardii up to 4 inches in diameter! Oh yeah; I’ve got this figured out!
When establishing plants onto tufa, it seems most of my fellow gardeners utilize the drilled-hole method. Using a masonry drill-bit such as a 3⁄8-inch diameter, a hole is drilled into the face of the tufa down into its interior. A rooted cutting, or else a very small division, is selected and its roots are carefully twisted down into the borehole. The hole is backfilled using the tufa dust excavated during the drilling, or a tiny lump of tufa smashed with a hammer. This method of installing plants into tufa seems to work for most; however, I have rarely succeeded with this approach. I take a different path, one that works very well in my garden; I call it “greasing.”
As I live in the land of clay I make use of what I have. And I always have a bucket or so of dried-out clods on hand of the stickiest, greasiest clay that I happen to come upon. Once these clods dry they are rock- hard, so it takes a hammer blow to break them into marble-sized pieces. I’ll throw a handful of pieces, a dozen or so, into a small plastic bowl and add just enough water to cover the lower quarter of the little clay bits, and let them sit long enough to soak up all the water until they are malleable yet firm. I work them between my index finger, middle finger and thumb, kneading, rolling, and pinching. If I added too much water it won’t hold together especially when it dries. I need to add some clay dust and rework it. I want to be able to work each ball, have it hold any shape I make it, compress it without having any cracks open up. If this occurs they are too dry and I work in a tiny bit more water, and rework it until I can compress it without cracks. Think of sculptor’s clay, if you have ever had the opportunity to work with any. Somewhat firm, yet with enough slippery-greasiness that your finger slides across it – that’s the texture.
Once I’ve got what I am after, I take a bare rooted-cutting and find an appropriate siting on the tufa. When you’ve worked with tufa for
a while you can recognize the softer areas; they are rougher, more pitted, somewhat darker. I lay out the bare roots across such a patch of tufa and while holding the plant by whatever (stem, crown, or what have you), I take the greasy little ball of prepared clay, set it onto the roots of the cutting, and as I push the clay down onto the roots, I drag or swipe my finger downward from the crown towards the root tips, sandwiching the roots between the tufa face and the clay. It is as quick as wiping toothpaste off your finger, once you’ve gotten the hang of
it. If the cutting has enough of a root system to splay them out on the tufa face, I’ll swipe the clay out in similar fashion. I try and get a clay layer about 1⁄8 inch or so in thickness. I have found that this is sufficiently thick that when it dries like adobe it will last for a couple of years. By the time it has weathered away, the roots have penetrated into the tufa’s interior. If the clay curls up behind your finger when you swipe it across the roots, the clay is still just a bit too dry; add a couple of drops of water and rework the clay. Also dribble a tiny bit of water onto the tufa where you plan on placing the cutting and try again. Using this approach, I have affixed rooted cuttings of various alpines onto tufa including Arenaria, Daphne, Dianthus, Eritrichium, Gypsophila, Phyteuma, and saxifrages.
This once-hard-to-come-by stone has become far more available due to the huge deposits of tufa in western Canada. Now garden clubs can pool their resources and purchase tufa by the boxcar load. But if you attended the 2003 Eastern Winter Study Weekend, you will recall the bounty of local tufa offered on the silent auction tables. That will be repeated at this year’s upcoming 2015 NARGS Annual Meeting hosted by the Great Lakes Chapter. What’s more, there will be local tufa available by the pallet-load at very reasonable prices and for advanced information contact Michael Greanya <[email protected]>.
So forgo the hassle of flying, rent a truck or a trailer, come to Michigan in May and go home with your own tufa bed in the making.